I can't believe that 'S' is turning 1 on Monday!! Where did the time go? It has come up on me so silently that aside from the cake I have done virtually no planning! Time to really step it up I suppose....
I do have the princess doll mini cakes but aside from that I don't think that I want to go overboard with a princess theme. My initial thought was perhaps a spring color themed party but as I am buying party supplies there is alot of pink showing up.... I am also having a hard time finding a baby girls birthday party theme that isn't surrounded in pink so it looks like it will be up to my own creativity to come up with something spectacular for her special day!
'G' seems to be handling the idea of her party coming up very well, we went shopping for birthday presents today and he was picking out all sorts of toys and aside from suggesting she might like a tool set he seemed to be interested in celebrating her birthday! He picked out a little piano for her from him it was very sweet.
I'm really looking forward to her birthday but a big part of me is kind of sad that it is already here! She is getting so big and just doesn't look like a baby anymore, she is really growing into a toddler now. Which reminds me how much 'G' is growing from a toddler into a little boy. I am so thankful for my beautiful children, I just want to appreciate every flying moment that we have with them.
~K
Tuesday, 10 May 2011
Wednesday, 4 May 2011
six.
Sadly as nice as the last cake looked it was not a crowd pleaser, so back to the drawing board (a.k.a internet) and I found a great recipe on http://www.sweetapolita.com/ if you like to bake I really suggest checking out her site! I'm not going copy and paste the whole recipe because there was alot to it... Essentially it is a Neopolitan Cake, you can look that up on the link above if you're really curious. It has 5 layers in it: 2 chocolate, 2 vanilla and 1 strawberry. In bewteen the layers is a strawberry raspberry jam and it is covered with Buttercream icing.
For the jam filling I took a jar of unsweetened raspberry jam and heated it on the stove in a small saucepan, I then added about a cup of frozen strawberries and brought the mixture to a boil. I then strained the sauce and re-jarred the jam and set it in the fridge overnight. It was tastey!!
Here is the first vanilla layer, fluffy egg whites and almond extract really made a difference here!

After the vanilla was chocolate, with coffee as a wet ingredient! Need I say more?

Third was the strawberry cake with strawberry Jello and strawberry puree.... Yum!

The cake was so tall I ended up taking out one of the strawberry layers to make it a more reasonable height.
I stacked the cake layers with the jam filling between each in the following order;

I then applied the crumb coat,

It went in the fridge like this for about an hour. Then I took it out and iced it,


For the jam filling I took a jar of unsweetened raspberry jam and heated it on the stove in a small saucepan, I then added about a cup of frozen strawberries and brought the mixture to a boil. I then strained the sauce and re-jarred the jam and set it in the fridge overnight. It was tastey!!
Here is the first vanilla layer, fluffy egg whites and almond extract really made a difference here!


I stacked the cake layers with the jam filling between each in the following order;
- Vanilla
- Chocolate
- Strawberry
- Chocolate
- Vanilla

I then applied the crumb coat,


And I couldn't have done it without my little kitchen helper....


"Mom can we please have the cake now?"

I just love the way this one looks when you cut into it! And it was much better received by the critics.
~K
Monday, 2 May 2011
five.
Practice cakes for 'S's birthday party have begun! Let me share with you the steps I have taken so far....
Preheat oven to 350 degrees F (177 degrees C). Spray two 9-inch x 1 1/2 inch (23 x 4 cm) cake pans with a non stick vegetable/flour spray, line bottoms with parchment paper, then spray again with the non stick vegetable/flour spray. Can also butter and flour the pans instead of using the spray.
In a medium bowl whisk together the egg whites, 1/4 cup (60 ml) milk, and vanilla extract.
In the bowl of your electric mixer combine the dry ingredients (flour, sugar, baking powder and salt) and mix on low speed for about 30 seconds or until blended. Add the butter and remaining 3/4 cup (180 ml) milk. Mix on low speed until the dry ingredients are moistened. Increase the mixer speed to medium and beat for about 2 minutes to aerate and develop the cake's structure. Scrape down the sides of the bowl. Gradually add the egg mixture, in 3 additions, beating about 30 seconds after each addition to fully incorporate the egg.
Divide the batter and pour into the prepared pans, smoothing the surface with the back of a spoon or an offset spatula. (Pans will be about half full.) Bake 25 to 35 minutes or until a toothpick inserted into the center of the cake comes out clean and the cake springs back when pressed lightly in center.
Place the cakes on a wire rack to cool, in their pans, for about 10 minutes. Then invert the cakes onto a greased rack. To prevent splitting, re-invert cakes so that tops are right side up. Cool completely before frosting.

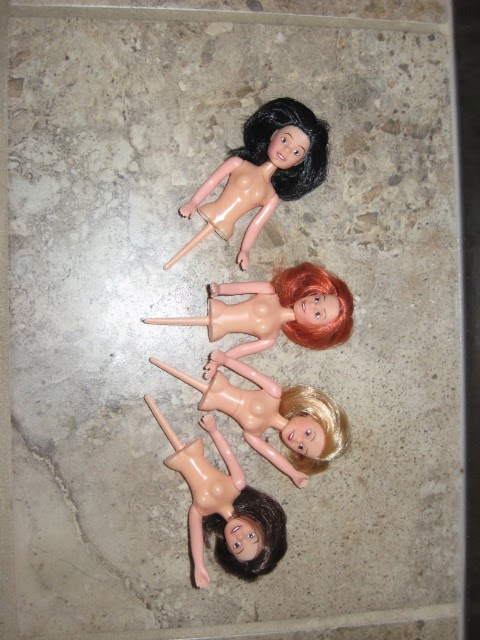
Here are the dolls that I will be using...


This is how the "skirts" turned out, I was very happy with them!

Here is how they looked after the crumb coat, apparently not only used for fondant! I have never used one before and I would highly reccomend it! Basically you ice a layer to thinly cover the cakes and scrape them smooth. I found a great technique, you simply take a strip of ordinary paper
and make a U shape with it, you then place the bottom of the U opposite from you on the cake starting at the bottom gently pull it towards the top of the cake. I couldn't believe how smooth the result was! I hope that made sense, if it didn't and you would like to see how it's done let me know and I will find the video and post it. Once you have smoothed the icing out you place it in the fridge to 45 minutes or so and then proceed to ice the cake as usual, it makes it so much easier to decorate!


Vanilla Cake
- 5 large (150 grams) egg whites
- 1 cup (240 ml) room temperature milk, divided
- 2 teaspoons pure vanilla extract
- 3 cups (300 grams) sifted cake flour
- 1 1/2 cups (300 grams) granulated white sugar
- 1 tablespoon + 1 teaspoon baking powder
- 1/2 teaspoon (5 grams) salt
- 12 tablespoons (170 grams) room temperature unsalted butter, cut into pieces
Preheat oven to 350 degrees F (177 degrees C). Spray two 9-inch x 1 1/2 inch (23 x 4 cm) cake pans with a non stick vegetable/flour spray, line bottoms with parchment paper, then spray again with the non stick vegetable/flour spray. Can also butter and flour the pans instead of using the spray.
In a medium bowl whisk together the egg whites, 1/4 cup (60 ml) milk, and vanilla extract.
In the bowl of your electric mixer combine the dry ingredients (flour, sugar, baking powder and salt) and mix on low speed for about 30 seconds or until blended. Add the butter and remaining 3/4 cup (180 ml) milk. Mix on low speed until the dry ingredients are moistened. Increase the mixer speed to medium and beat for about 2 minutes to aerate and develop the cake's structure. Scrape down the sides of the bowl. Gradually add the egg mixture, in 3 additions, beating about 30 seconds after each addition to fully incorporate the egg.
Divide the batter and pour into the prepared pans, smoothing the surface with the back of a spoon or an offset spatula. (Pans will be about half full.) Bake 25 to 35 minutes or until a toothpick inserted into the center of the cake comes out clean and the cake springs back when pressed lightly in center.
Place the cakes on a wire rack to cool, in their pans, for about 10 minutes. Then invert the cakes onto a greased rack. To prevent splitting, re-invert cakes so that tops are right side up. Cool completely before frosting.
The batter made 4 mini cake pans used for the dresses of the dolls and one 9" round layer.

I'm thinking I'll make one layer vanilla and the other one chocolate...

This is how the "skirts" turned out, I was very happy with them!

Here is how they looked after the crumb coat, apparently not only used for fondant! I have never used one before and I would highly reccomend it! Basically you ice a layer to thinly cover the cakes and scrape them smooth. I found a great technique, you simply take a strip of ordinary paper
and make a U shape with it, you then place the bottom of the U opposite from you on the cake starting at the bottom gently pull it towards the top of the cake. I couldn't believe how smooth the result was! I hope that made sense, if it didn't and you would like to see how it's done let me know and I will find the video and post it. Once you have smoothed the icing out you place it in the fridge to 45 minutes or so and then proceed to ice the cake as usual, it makes it so much easier to decorate!

Crumb coat for the cake.

The final result to the doll...

Final result for the cake...

I hope you enjoyed these, please leave me a note and let me know what you think!
~K
Subscribe to:
Posts (Atom)